
Needless to say, I'll use these pages to present my Orks with a few details...
I'll start with some pictures of the Dakka / Burna Bommer.
During assembly, I was thinking about a transport plane. So I used some Stormboyz that I can parachute themselves right out before the Burna Boomer dropped his promethium bomb.

The jet body was lengthened adding a door and some additional "metal" plates.


After black basecoat, I dry brushed the rust colors.

Thanks to Phil's liquid mask and Tamiya tape, I protected rusted area and sprayed the main yellow color.
Once dry the mask works great even in recess areas.
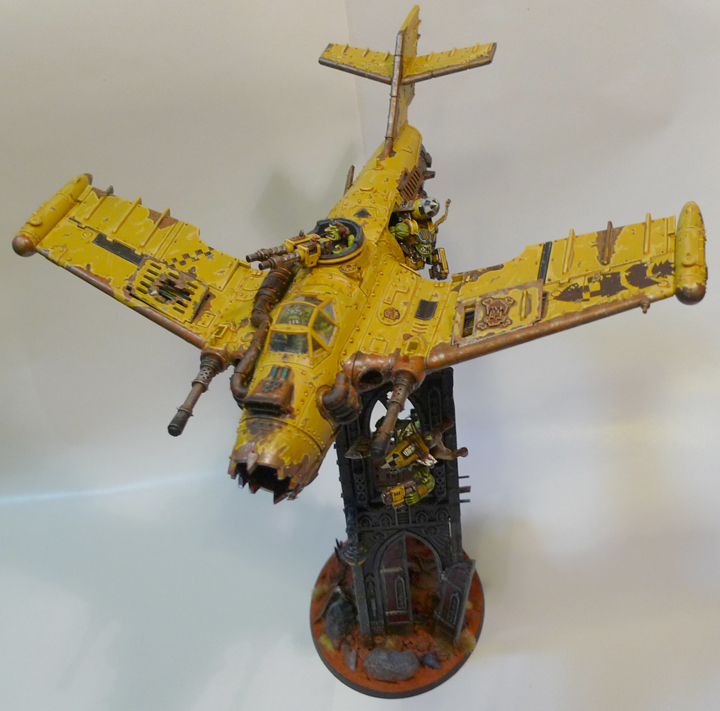
I spent a bit time on the base.
Used the pigments for it and will probably do the same for the remaining of the army.

We tried the DakkaJet last weekend and for Ork standard it's pretty shooty!
Tim's tanks can't confirm this anymore though..
Hope you like it
Clm
simply stunning work and a great tutorial for the younger guys to follow
ReplyDeleteHi it's Scotty. Nice work man, looks great. Im new to blogspot, how the bejesus do I post on here.....?
ReplyDeleteHi Scotty, I have added you on the author list with email invitation. Let me know if that does not work.
DeleteOoooo also I've got a suggestion of something you might like to try out.
ReplyDeleteAfter doing everything you've already done airbrush a gloss or satin acrylic varnish over the entire model.
Then you can use oil paints (the cheap chinese variety will work) heavily thinned down with tamiya enamel thinners (or garden variety white spirits if you can find it) to pin wash all of the rivets and panel lines.
Leave it to dry for an hour or so and then any unwanted paint left can be easily cleaned up with a cotton bud, piece of paper or brush dampened with the same thinners. A dark brown or rusty orange colour would work amazingly well on this yellow.
After that leave it for a few hours to dry some more and then finish off by airbrushing the entire model again with an acrylic matt or satin varnish to seal in the oils. I would highly recommend Vallejo acrylic varnishes.
This technique is also excellent for creating oil and weathering streaks on vehicles. just remember to remove the excess in the direction of airflow or run off etc.
Another good thing about this technique of weathering is that it's completely reversible if your not happy just wash off the oils with thinners before applying a sealing coat.
Thanks
Scotty
Thanks on all the advice.
DeleteI'll need to get some material to do that.
Couple of questions:
" airbrush a gloss or satin acrylic varnish "
--> Do you use pressure gun for this or spray can are enough?
"I would highly recommend Vallejo acrylic varnishes."
-->Same question actually, do you use liquid varnish that you spray or cans.
The whole process seem to take a but time, but using the citadel washes for weathering doesn't look to good on the plane for the moment.
Ok to answer your first question the answer is already there. I use an airbrush, or a low pressure spray gun. Using a can is fine but most important is that it is acrylic varnish otherwise the thinners for the oil paint will eat through the varnish. So don't use MR.COLOR varnish because this is solvent based laquer.
ReplyDeleteI use vallejo liquid acrylic varnish and shoot it through my airbrush. They also make cans of acrylic varnish ready to spray but I don't know if the're available here in China.
It does take a while but the good thing is that oil paints take forever to fully cure so you can really play around with different weathering effects and if your not happy just wash it back off